One of the very first improvements to my house was a lovely new mailbox, courtesy of my father’s need to have a project. The previous version was a rusting black metal monstrosity, complete with silver floral detail. Fairly hideous, really. And my mailbox is under roof on my front porch, so there is no need for it to actually have a lid that closes. So my dad made me a pretty wood mailbox, well-planned to attach to the already existing screws, and it’s gorgeous.
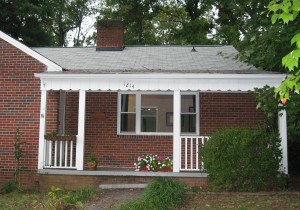
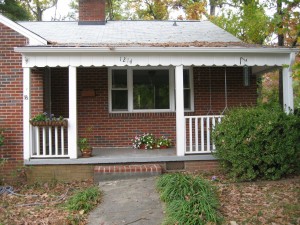
And then there is the step my dad built. Well, really, that he designed/planned, and he and I built, because it was definitely a cooperative project. I kinda know how to lay brick, now! The step was a really short, maybe 4-inch step from the ground, that then left a 10-inch step to get onto the porch. Also, the ground has settled over the years, so the left side of the step was at least 2 inches lower than the right.

My dad loves brick. So we immediately decided that we needed to level the step, and make it taller, and what easier way to make it taller than to put a row of bricks on its top? I’m sure there are actually a ton of easier ways to make a step taller, but this was our choice. So first, we visited the brickyard to find brick that matched my house. I’d never really thought about all the different colors of brick before this trip – there is a dizzying array of options, really. But we got brick that matched well, and then Dad built the form for the step. Because of the need to level the step, as well as make it the right dimensions for bricks to go on, we used Sacrete (sanded concrete) to build out the step, make its top level, and give us a surface to place the bricks on. Then it was bricklaying time – I taped the sides of the bricks that faced out, so they didn’t get all mortar-y, and we laid them in the pattern I wanted – straight along the front row, which my father required, since those’ll get stepped on the most, and then an alternating pattern for the back row. Once it was all laid and mortared, we covered it with plastic (rain was forecasted) and misted it regularly for three days – I didn’t know this before, but evidently the longer your mortar/concrete takes to dry, the stronger it will be, because it has more opportunities to form bonds.

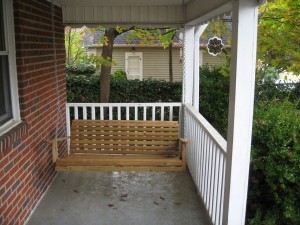
We also hung the swing… three times. I bought this swing from a local guy – it’s a well-built piece, which is good because it’s hit the floor twice now. The first time, my dad and I screwed bolts into the place where the joist was supposed to be, based on my measuring in the attic and a bit of trust that what felt like solid wood behind the drill bit really was. We sat in the swing, a bit gingerly, but it worked great… until my side ended up on the floor with a BANG. The chain had snapped. So I went on my daily pilgrimage to Lowe’s, where I acquired heavier chain. After Dad did some work with his vise to open out the S-hooks to accept the bigger chain, I re-hung the swing on my own. Sat in it a few times, was beginning to actually relax. And then Dad came over to visit, and to sit in my swing. I joined him. And BANG. The bolt on his side pulled out of the ceiling, taking down a couple of sections of ceiling vinyl as well. This was useful, because it allowed us to see the actual plank ceiling, and determine that we were only about three-quarters of an inch from the joist on that side. The other side was firmly in the joist, so no worries there. We drilled the new hole, re-screwed the bolt, and sat, very carefully, in the swing, for now the third time. It is secure, and yet I’m just a bit wary of it nonetheless. I do still have to stain and poly the swing so it has a chance of standing up to the weather that it’ll be subjected to out on the porch, but it’s been hung, dangitall.

My mom and I did flowers, too! I have a hanging box of pansies over the railing, and a floor box under the front window at the moment – that one’s still got impatiens in it, which are on their last few days of existence now that it’s really getting cold at night. The pansies will hold up during the winter, though, and I’ll decide whether the floor box gets replanted with new impatiens in the spring, or if I’ll save it for use in the backyard later.
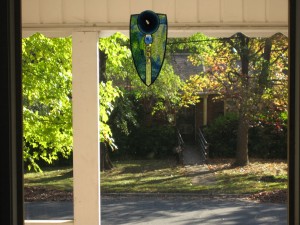
And this last bit isn’t technically porch, but it looks out onto the porch, so I’m including it – I finally hung my stained glass piece – this is what I bought at the Folk Art Center this summer, knowing I was about to buy this house. And now it’s in my front window, being gorgeous.


Jill! I love your blog. Please keep updating with lots and lots of photos so I can pretend I’m your neighbor.
You and your dad are so handy! And I love seeing all your art. I’m all “hey, that looks familiar!”
I miss you!
The pictures are very much appreciated as I love a good before-and-after. You and your dad are so handy!