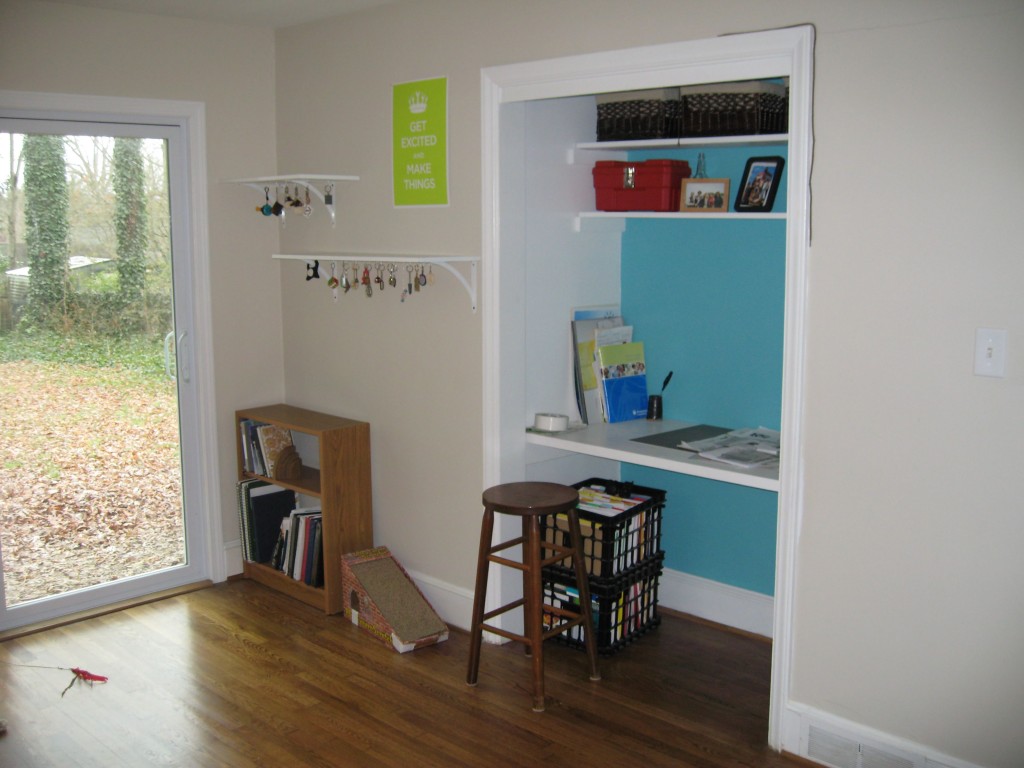
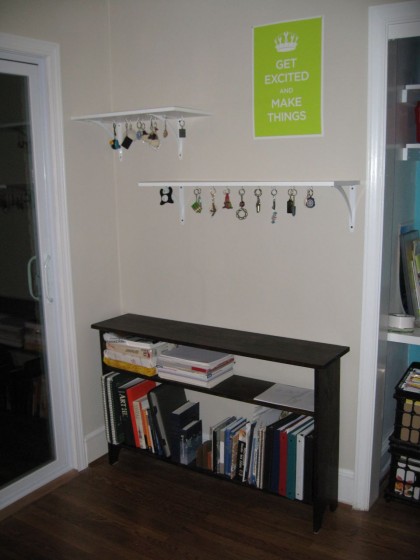
As you can see in this photo of the studio, there’s this tiny little bookshelf on a wall that’s way too big for it, so I wanted to replace it with a wider bookshelf, maybe 4 feet wide, with a very tall bottom shelf where my sketchbooks would fit – that one all the way to the left is 14″ tall, and that’s the only shelf in my entire house that will hold it. So I started searching for bookshelves. And discovered that bookshelves of that size are pretty much uniformly expensive, particularly if you want one not made of mdf. I think mdf is awesome and really useful, but it’s also amazingly heavy, and I’d decided I’d rather have a bookcase made of real wood – even cheap, soft wood, like pine.
So rather than spend $200 on a bookcase, I decided to build one. It didn’t even occur to me until halfway through the building process that I’d never built a bookcase before, and perhaps I should have had a bit more trepidation, but I think this is where my artistic history serves me well. I don’t look at an idea and think something like “hm, I’ve never built a mobile before, perhaps I should reconsider” – I just decide to do it, and the worst that can happen is that it’s not a very good mobile.
So I have a very limited array of woodworking tools – that is, a circular saw, a jigsaw, and a Dremel. I also have a limited car – no boards over 6 feet long will fit. So, armed with this knowledge, I set out to design myself a bookcase I thought I could build. My dad showed me one he’d built, which helped me visualize how a dado works, and then we looked at another shelf, which showed me how a blind dado works. So I sketched my plan, figured out what wood I needed, and headed to Home Depot.
I decided to use pine. Though it is a soft wood, it’s strong enough for what I need, it’s inexpensive, so if this turned out horribly, I wouldn’t feel too terrible about wasting money, and it’s readily available in all sorts of sizes. So I bought two 1×10’s, 4 feet long, for the shelves, and a 1×12, also 4 feet long, for the top. Then I got a 1×10 that was 6 feet long – this would get cut in half to become the two sides. I made sure to find the flattest, least knotty pieces I could – warped wood would complicate my building process immensely.
Once I got it all home, it was time for measuring – making the bookcase 30″ high required sides that were 29.5″ tall, so once the top was added, the height would be correct. Also, since I had a 4-foot board for the top, the shelves needed to be shorter, so I could have a 1″ overhang on all sides. So after measuring twice, I cut each board to the correct length with my circular saw, which is very effective and which I’m also… not precisely “scared” of, but… let’s call it “respectful”. That is a very sharp blade spinning very fast.
With all the boards at the right length, I used my jigsaw to cut half-circles out of the bottom of the side panels, so the bookcase has feet.
Now it was time to make dados. Basically, this is carving out a slot in the surface of the sides, so there’s a place for the shelf to sit. I decided to complicate this by doing blind dados – so the slot ends about an inch from the edge, and the shelf gets a notch cut in the end, so the dado doesn’t show from the front or back. Luckily, the router bit I got for my Dremel makes this fairly straightforward. I had to do two passes on each slot, because routing out 1/4″ is more than the Dremel could handle all at once, but 1/8″ at a time worked quite well. This is pretty much the only time I wished I had more clamps – being able to clamp a guide piece to enforce a straight line would’ve been helpful.
With the dados cut, I had to notch the shelves to match them. This was simple with the jigsaw, though they all took a bit of finessing to fit perfectly into the dados.
I dry-assembled the shelves and sides so that I could work out the locations of the dados in the top – one of my side pieces was a bit warped, so I knew it wouldn’t sit perfectly straight to the edge. So I set the top on the ground and flipped the whole shelf assembly upside down atop it, then marked where the sides met the top. This is when I dropped a board on my head, since they weren’t glued in yet. Ow. So I had to re-assemble it to mark my dados. Then I dado-ed the top, and all my pieces were ready.
I took some advice I’d seen online, and stained all my pieces before assembly, taping off the ends where the glue would eventually go. It’s a lot easier to stain five flat boards than it is to stain an assembled bookcase. I picked Minwax Dark Walnut for the stain to match my IKEA bookcase which will eventually join my studio furniture (this’ll happen as part of the kitchen renovation, which will be a REALLY BIG THING).
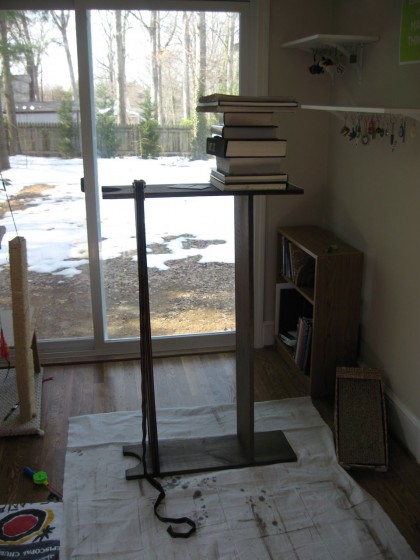
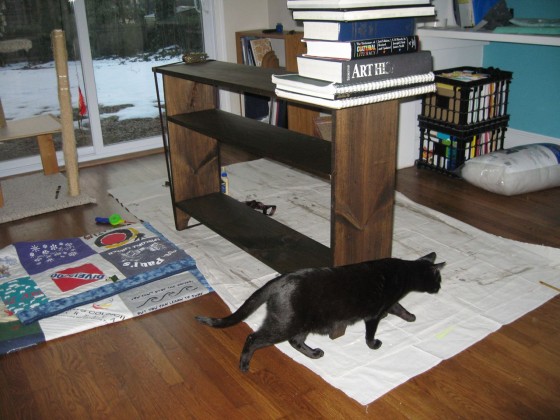
All this wood cutting and staining occurred in my basement, but I decided to actually assemble the pieces upstairs in the studio – no reason to haul a complete bookcase up stairs when I could carry up the boards individually, and build it in place. The whole bookcase is held together by the structure of the dados, and wood glue inside those dados. So I glued my shelves and the sides to each other, and camped them firmly – one end with a strap clamp, the other end with a stack of heavy books. The strap clamp definitely wins for sealing the joints together – the book-weighted shelf doesn’t meet quite as firmly. But it’s quite secure, which is good enough.
A day later, I unclamped the whole shelf assembly, tested gently to make sure all the joints were set, and glued the top on, re-clamping/weighting for another day to secure the top.
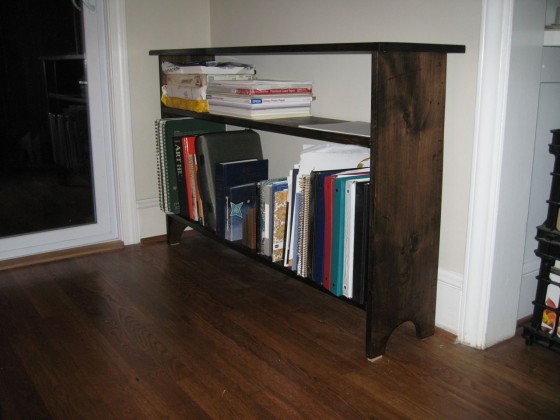
Finally, I went back and touched up the stain – a few places where I’d taped too zealously along the edge of a dado, or where the better light in the studio showed a under-saturated patch. Then, with a couple coats of a satin wiping varnish, and a couple days to dry, the whole bookcase was done, and ready to sit in its permanent place.

Your bookcase is great! I really love that you built it yourself. Keep the home improvement posts coming!
Thanks! I’m trying, but having a job is cramping my style! Not that I’m complaining…
You’re a beast! I’m just going to come through and post serial comments on your blog. You and Robert need to get together and geek out about woodworking. I gifted him a “make your own cabinet” woodworking class from Highland Woodworking and there’s no stopping him now.
That shelf looks amazing, you did a great job.
Ooh, woodworking geekery! I fear this is one of those hobbies that can take over your life until you’re surrounded with furniture and have nowhere to put it! But wow it’s fun.