One of the things I knew I wanted for my living room since I moved in – well, actually, two things – was a pair of chairs in front of the fireplace. Comfy chairs, the kind you’d curl up in to read a book, with a cat on your lap, even. I thought this might be simple – I had one Danish Modern-style chair, inherited from my grandparents, which matched my loveseat, and I was pretty sure there was a second one in my parents’ storage area. So we went to dig it out, and discovered that somehow, some way, the left arm of the chair has disappeared. Or maybe never existed. There was a weird non-arm end that would fit on the chair, but it was a totally different style (square leg instead of tapered round one, total lack of arm…). Anyway, this was not a complete chair, and therefore could not be used as my second chair. So the existing chair moved into the spare room, and I was back to a blank slate for the living room.
So the chair search began. I’d seen the IKEA Tullsta chairs before – cute, small-scale, round-backed, upholstered chairs. That was what I wanted. Only, I thought, maybe someone made a chair like that but a bit better quality. So we began to search. And spent an entire weekend traveling to furniture stores, looking at huge overstuffed armchairs and slightly smaller but still huge armchairs, and really expensive armchairs, and chairs that spun, and chairs that rocked, and chairs that were nowhere near as comfy as they looked, and every sort of armchair except the kind I wanted – a smallish, modernish, comfy armchair that wasn’t ridiculously expensive.
So a couple weekends later, we went to IKEA and bought the chairs I’d liked from the beginning. I don’t know if the fact that they cost an eighth as much as all the others we saw means that they’ll really last that much less time, but we’ll find out, I suppose.
The next problem appeared immediately. This chair comes in two colors, or one of five slipcover colors. Not a single one of those colors works in my living room. Okay, maybe that’s an exaggeration. The white or “natural” ones would be great – for a day. Wait, less than a day – until one of the cats sat on it (black cat, black and grey striped cat… this fur, it does not match…). So I decided to re-upholster the chairs. I acquired just one slipcover to help me in this goal – taking it apart provided a pattern to work from.
We spent another weekend, this time searching for the perfect fabric – something that wouldn’t be too dark in the room, as well as went with the turquoise wall and the existing tan couch. We found a good range of options in the medium tan range, some with pattern, some with texture… and then my mom and I both fell in love with a dark brown fabric with overlapping circles. We were both worried it might be too dark, but we took a half-yard home with us and determined that, while it’s dark, it’s not too dark, and it was definitely our favorite. So I went back on Monday and bought seven yards, enough to re-cover both chairs and have some to spare for accent pillows.
Once I had the fabric, the work table in the studio became incredibly useful – I could roll out the fabric, draw the pattern shapes onto it, and cut it without having to move it around or constantly shift to keep a flat surface beneath it. I did end up actually having to clamp it to the table while I worked – my cats found the dangling end far too enticing and yanked the whole roll sideways more than once.
Once all the pieces were cut (being very careful to keep the fabric the same direction throughout) the upholstering process went like this: cut the three front pieces, sew them together, and drape them over the chair (inside out, as all of these steps are until the very end). Sew the back three pieces, except only sew the top five inches of one of them – the chairs are bigger at the top than at the bottom, so one of the back seams stayed open until the very end, when I sewed it shut ON the chair, in its permanent location. Pin that seam closed, pin the front to the back. unpin the back seam, remove the whole array from the chair, sew the front pieces to the back. Re-affix it to the chair. Very carefully pin the front arm piece.
The arms were definitely the hardest part – getting the pieces to meet properly at the arm, and then sewing around a very tight curve without accidentally creating a fold, wrinkle, or mysterious wobble. It went kind of like this: Sew the arm. Discover a huge fold has been created. Re-sew the arm. Curse, a very little, very quietly. Re-sew the arm. Curse, slightly more loudly. Sit on the floor in front of the arm with a curved needle, sew the arm by hand, stab self with needle. Curse very loudly, take the rest of the night off. Next day, sew the arm, one last time, with the sewing machine, and decide you’re done with the stupid arm, no one’s going to notice it anyhow. (By the fourth arm, discover that practice really does make perfect, but decide not to take the first arm apart anyway, because you’re done with arms, dangitall.) Sew super-cheap fabric for the seat area to the piece that goes across the front below the cushion. Sew that to both arms.
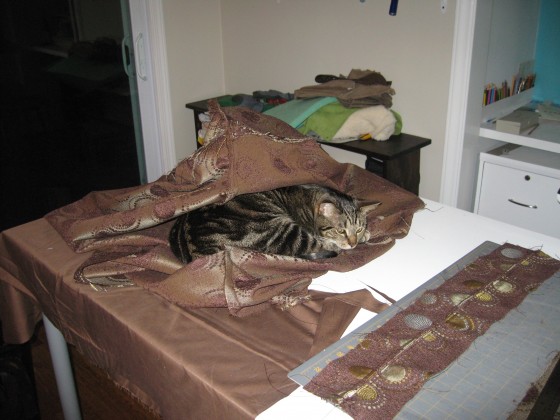
Leave on table for the day, discover that cat has used it as a sleeping cave:

Lint-roll entire piece to try to keep from permanently enshrining fur inside the chair.
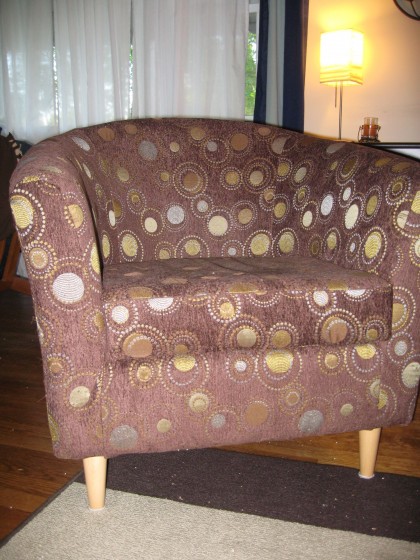
Now I had this incredibly unwieldy, odd-shaped piece of fabric to turn right-side out and check on the chair. I decided to do this as upholstery, not a slipcover, meaning staples were very useful in pulling the fabric tight. I bought myself a staplegun, which quickly became my favorite tool ever. First I stapled down the inside front fabric, then the seat cover, and finally the bottom of the chair, all the way around. And then I did the whole thing again, for chair number 2. And then I took apart the seat covers and made new ones. They actually have zippers, mostly because it was easier to install a zipper than to sew them closed by hand. I figure the first chair took about 10 hours, the second one more like 6. And this is what the final chairs ended up looking like:

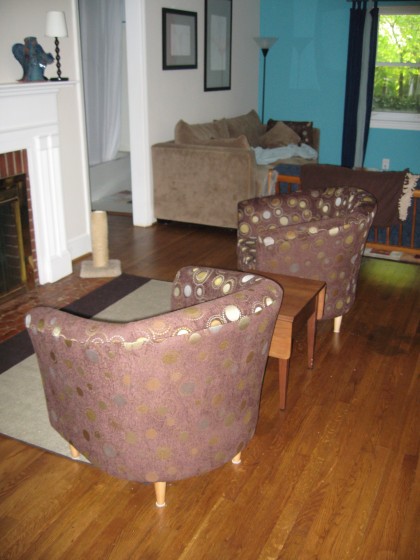
And this is what they look like in front of my fireplace:

I’m very happy with how they turned out. The project isn’t quite over because I do want to make a couple of accent pillows in bright turquoise to match my walls – that’s why they don’t have their lumbar pillows, and why my studio table is still covered in upholstery materials. It probably won’t happen before my party this weekend, though, so I’ll have to clean up soon!

Jill, those look fantastic!! You’re a lot braver with upholstery than I am…our second-hand armchair just has a giant slipcover draped over it. Love the fabric too!
It’s not bravery so much as recklessness – I figured, if I’d saved $400 by buying inexpensive chairs, the worst I could possibly do was waste $100 of fabric, and even then I’d still be ahead. And really, as long as you don’t cut a piece too small, there are very few things you can do in upholstery that are irreversible. I say go for it.
You did such a good job! I have a chair that I want to recover that I’m scared of…not sure how that one’s going to sort itself out. I bet your chairs will last a while. The couple at the Young House Love blog have had a pair in their den for several years and they still seem to be going strong.
Party?? Do tell!
Oh my gosh, Young House Love is totally my blog obsession. I’m not hugely concerned about the longevity of the chairs now, since I know I can always make new covers for them, having done it once, and they seem pretty sturdy otherwise.
Don’t be afraid! Like I told Jenn, there’s not much you can do to upholstery that’s irreversible – if you sew or staple a seam wrong, take it out and try again. Best advice – take the current upholstery apart, and that’ll show you how it went together the first time – it’ll help you make a plan of attack.
I’m having a housewarming party this weekend – not that my house is “done,” just that’s it far enough along that I’d like to show it off to people. So yes, party. :)
Beautiful! I’m wondering, though…where did you hide the zippers? I am on the verge of undertaking this project, and am trying to avoid the zipper down the back center like the ikea covers have.
Any comment would be appreciated!
I left the zippers out on the slipcovers, kept a back seam open, then sewed it up with the cover on the chair… so they’re not really slipcovers, but more actual upholstery. Good luck – it’s a fun project!
Help! I am looking for brads or pins (but not the usual straight pins for sewing) to keep my mother-in-laws arm chair covers in place, but NOT the screw in type. Thanks!