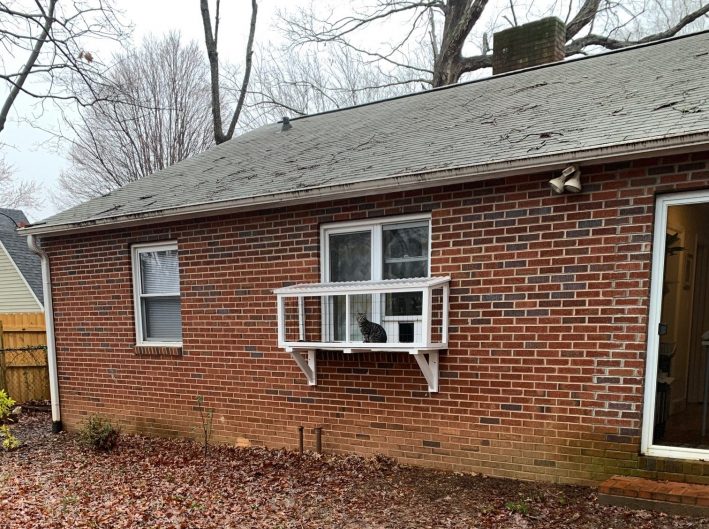
I have cats. Two cats, in fact, which is objectively the correct number of cats – they keep each other entertained, but there aren’t enough of them to start conspiring against you in any major way. Also they can both sit on me at the same time. Anyway, cats! A while back, I built the cat tree, which is still getting daily use.
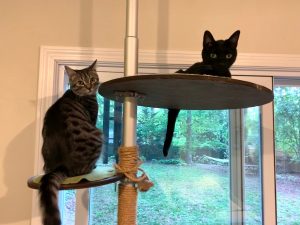
They love the cat tree, partially because it lets them look out the window to the backyard, where they can see all the birds and chipmunks and squirrels and other wildlife they would like to eat. So I started thinking that perhaps they would like to experience the outdoors a little more directly – but I’m not going to let them run free to actually eat all those various animals, or to get run over by a car. So I started investigating catios. Basically, outdoor cages for cats, that connect to the house somehow so they can go in or out as they please. Some people enclose their entire patio to make it cat-friendly, others do a simple window ledge so that the cat can get some fresh air. I decided I wanted to do the window-ledge version, and besides, I had a lot of scrap wood that needed to be used in a project.
With the goal of using up scrap wood came my dimensions – I had five tongue-and-groove boards left over from the porch ceiling project, so that gave me the depth (a bit more than 14″), and I needed a bit more width to span the window I was working with, so I added on a one-by six to each end, making my full span of floor exactly 70″, which, when combined with a roof overhang of 1″, brought the final length to exactly six feet.
The frame construction was basically a lot of lengths of 2x2s, held together with deck screws, with a 1×3 frame for the roof. I built the sides individually so that I didn’t have to try to carry the whole frame up from my basement workshop, so the floor was one piece, then the front, then the sides and then the roof. In this photo they’re just dry-fitted together to make sure they all fit:
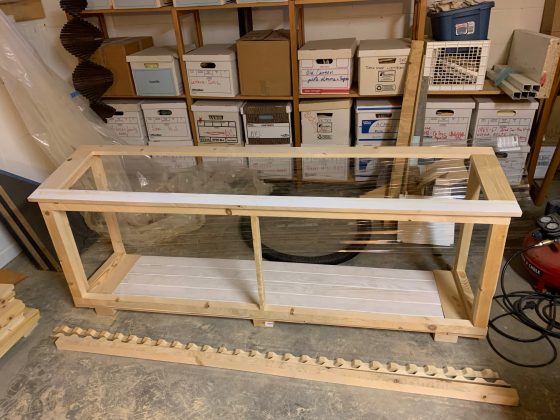
The weird wavy boards at the bottom of the photo are part of the roof construction, the one thing I did actually go buy separately. Rather than letting the rain in, I added a polycarbonate roof – which was definitely the biggest hassle of the construction process, as it required a lot of predrilling for the screws.
I didn’t take a lot of photos of construction, but here you can see the wall brackets I screwed into my brick house to hold the whole thing up:
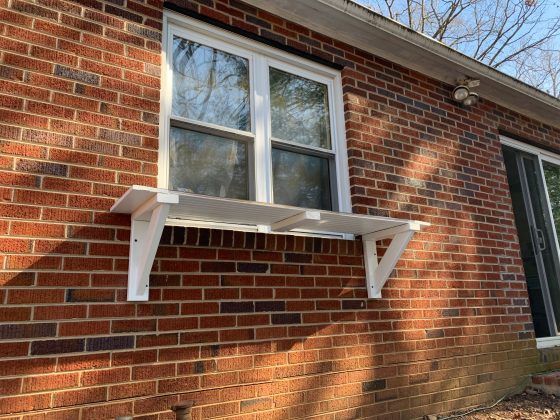
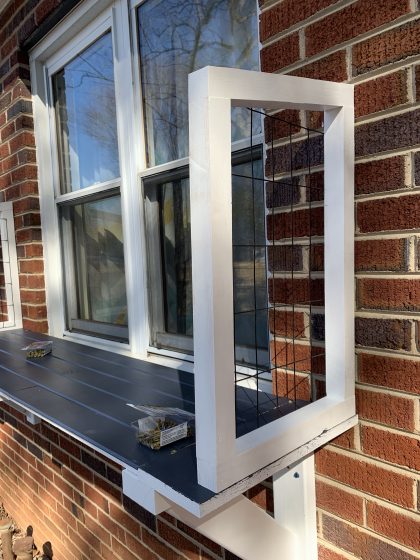
I built the structure in parts, so in that shot, the floor is attached, and in this next one, I’ve added the sides. You can also see the wire fencing that I used to keep the cat inside – it’s 2″x4″ metal fence, which used to be attached to make the chain link fence in my backyard higher. My neighbor has since built a taller, wooden fence that made the wire fencing obsolete, so I repurposed a chunk of it for this. Lots of fun cutting with a Dremel, and then painting with Rustoleum paint – it actually came out much better than it had any right to.
Anyway, so they I put on the front and the top, and then the roof. To give the cats access, I added a cat door to my window, much like a window air conditioner – the window just closes on the panel that holds the cat door, and the cats go in and out without too much air exchange.
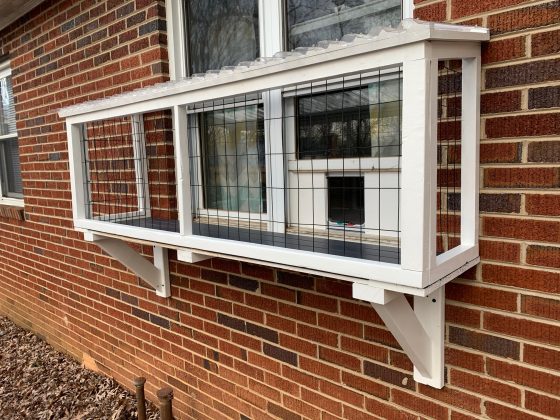
Pixel LOVES it. He spends time out there every morning and afternoon, and particularly likes near dawn – I think there’s more animal activity then, and I’m always asleep and therefore very boring at that time. Chaucer is much more cautious, and has ventured out a couple of times, but is much more content to stay indoors and watch the birds from a safe vantage point behind the glass.
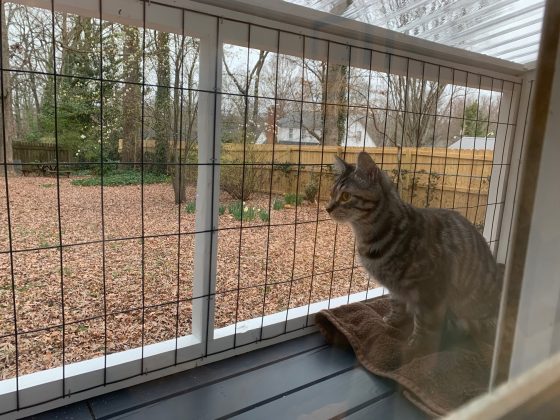
So it’s a very successful catio – gives the cats an outdoor option, used up some scrap wood, and doesn’t look too terrible from the outside, either!

