My contractor is very punctual – he was back on my doorstep at 7:30 this morning, ready for a day of electrical wiring, insulation, and the beginning of the sheetrock. When I came home for lunch, the electricians were in the attic, having cut holes for the can lights in the kitchen, and looking at locations for the studio lights. Those ended up on the opposite axis from where I thought I’d wanted them, because to center them longways, they’d have to cut into joists. Joists hold up the roof – so not a good idea. I decided I’d rather have them centered the short way than off-center longways, so that’s how they are. Then I had to go back to work and came home to discover: can lights in the kitchen – already hooked up to the switch, insulation in the outside walls, an outdoor lamp that actually works, complete can lights in the studio, an outlet in the studio closet, and sheetrock on two walls.
contractor, day 1
Well, my contractor did indeed show up at 7:30 this morning, with five burly guys who definitely knew what they were doing. They admired our demolition job, which made me pretty happy, and I asked my contractor if he could maybe get rid of the mountain of wood in the basement, which he agreed to (yay!). We did a quick recap of what they’d be doing, how high the half-wall should be, and that they’d be installing the header first thing. I headed off to work.
demolition party!
Well, yesterday my kitchen ceased to be a kitchen. It is now an empty room with some future delusions of returning to kitchen-hood. I invited a crew of friends and family to help me destroy it, and from 2:00 to around 6:00, that’s exactly what we did.
Continue reading
ready, set, go!
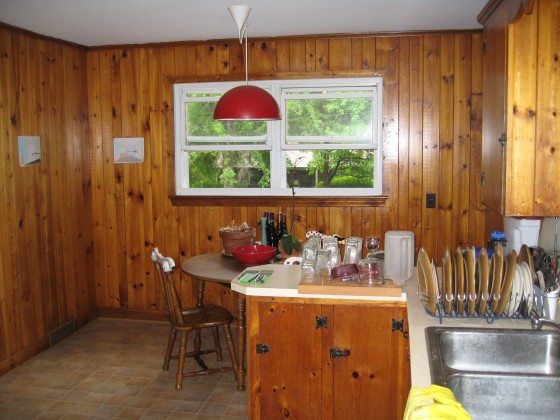
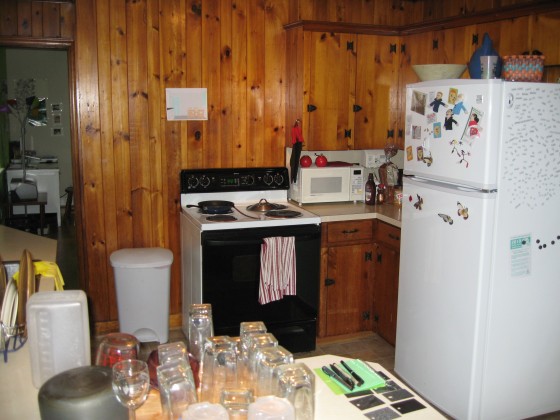
The kitchen remodel has begun, but this post is to show the starting point. Here is my kitchen as it was on May 31, 2010:
floor excavation
Today I took up a section of my kitchen floor. Partially to find out how hard it would be (short answer= HARD), partially because I wanted to feel like I was making progress, since all this planning with no action has finally gotten to me, and partially because I was just bored. Note – bored Jill is dangerous, destructive impulses appear and get followed instead of ignored. Anyway, I’m calling this an excavation because I got to see the history of the floor in all the different layers of linoleum.
planning a kitchen remodel
The kitchen is a pretty big project. I’m a confident DIY kind of person, but even so, this is a big project. So there’s a lot of planning happening at the moment. I’m sorting out what order everything will happen in, what I can do myself and what I need to hire out, talking to contractors, setting up the budget, and generally obsessing over details.
the kitchen arrives
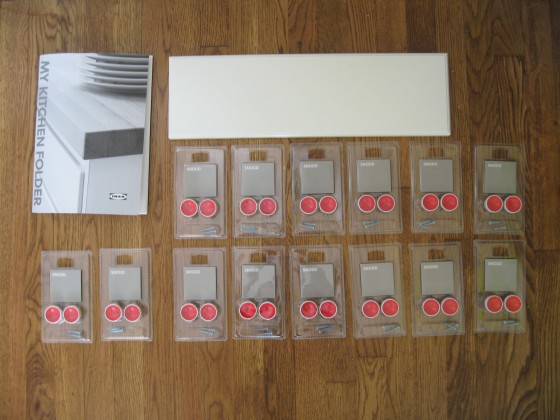
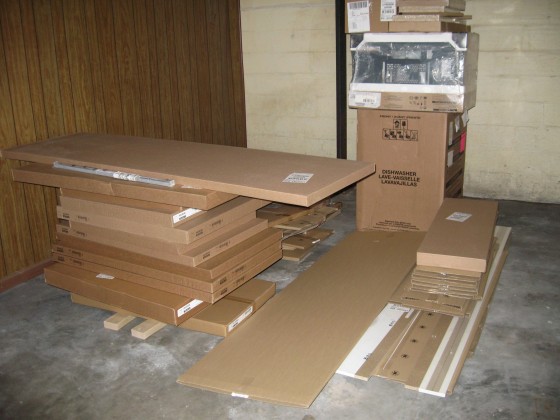
So, last I wrote, I had a door front and 14 packs of knobs. Now my basement man cave (really just an empty room, but that’s what we’ve been calling it) looks like this:
Continue reading
the kitchen begins…
Three weeks ago, I left work a bit early, picked up my mom at her house, and drove an hour to IKEA. It was time to order my kitchen – a move that happened a little earlier than planned because of IKEA’s spring kitchen sale. I decided I wanted to take advantage of the spring sale, and not have to wait for and count on the fall sale. So I finalized my kitchen plan, going to the extreme of actually installing Windows on my lovely MacBook Pro just to run the official IKEA software. Once I had it settled to my liking, I made an appointment with an IKEAN, hijacked my mom for an evening (with her gracious permission), and headed out. We got there a couple minutes early, and spent our spare time looking at range hoods and sink basins, two things I hadn’t made a firm decision about yet.
Then we met my IKEAN for the evening, pulled up my kitchen plan (saved to their servers online), and started the ordering process. Along the way, I added an over-the-range microwave that has an external vent, picked a sink, and failed utterly to choose a faucet, since I couldn’t find one I liked there. I’ll have to go hunting for options soon. We tweaked some innards (my pantry drawer/shelf ratio, for example), made the IKEAN show us both kinds of corner cabinet, the pantries, and the over-range microwave. He was great- knew exactly where each different option was, and explained why, for example, I didn’t want a shorter cabinet over the microwave… because I am tall, but not so tall that I want to reach over my head to take food out of the microwave.
Once we had the full plan finalized, he turned it into an actual order – which we then scrolled through to make sure all my doors were the right style, and all the pieces were correct for the various cabinets. We caught a couple that were wrong, fixed them, and then added the cover panels for the end of the cabinet runs. Then he advised me to call my debit card company, since many of them have a daily limit… which turned out to be true for me. The woman on the phone was very helpful in raising my limit — and also very amused that I was in IKEA, about to buy a kitchen. She told me to “have fun!” before we finished the call. Then I paid for all my cabinets, a microwave, sink, and dishwasher. YAY DISHWASHER – remember, the dishwasher (or lack thereof) is what started this whole process! We set up delivery, though the warehouse was missing one drawer front that the store had in stock, so I was instructed to pick up the drawer front and arrange for the delivery downstairs before we left. I also had to buy the knobs in-store, since the warehouse doesn’t stock them. Before we left the kitchen zone, I got handed a folder with the visuals of my kitchen plan, the order listed by cabinet, and then the order listed by part type (doors, cabinet frame, drawer runner, etc). It also had the assembly instruction DVD, and the very long receipt from the actual purchase.
We headed downstairs, picking up some minor odds and ends along the way – a drawer organizer for Mom, a whisk for me, 14 boxes of knobs, etc. After checking out, I picked up my drawer front and paid for delivery of the rest of the order. And then we left IKEA, about 2.5 hours after we arrived, having spent almost 4,000 dollars on my kitchen, carrying a folder, 14 boxes of knobs and a drawer front. And that is how it starts. Tomorrow, the rest of the order arrives.
the great upholstery project
One of the things I knew I wanted for my living room since I moved in – well, actually, two things – was a pair of chairs in front of the fireplace. Comfy chairs, the kind you’d curl up in to read a book, with a cat on your lap, even. I thought this might be simple – I had one Danish Modern-style chair, inherited from my grandparents, which matched my loveseat, and I was pretty sure there was a second one in my parents’ storage area. So we went to dig it out, and discovered that somehow, some way, the left arm of the chair has disappeared. Or maybe never existed. There was a weird non-arm end that would fit on the chair, but it was a totally different style (square leg instead of tapered round one, total lack of arm…). Anyway, this was not a complete chair, and therefore could not be used as my second chair. So the existing chair moved into the spare room, and I was back to a blank slate for the living room.
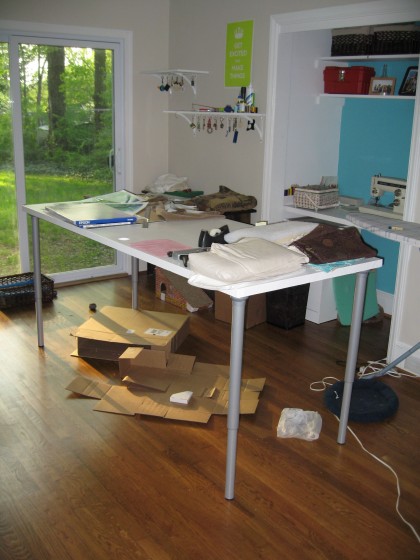
work table for the studio
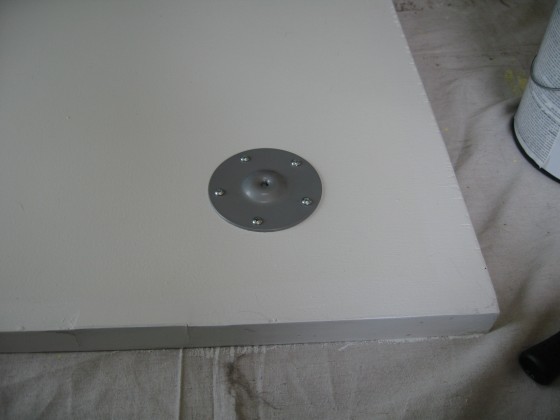
My studio plan has always contained a very large table – a workspace for whatever thing I happen to be working on. I wanted it to be standing-height, since a lot of things are easier with a taller table, and I wanted it to be a surface I didn’t care much about injuring. So I decided that attaching legs to a door would be the simplest and least expensive solution. On one of many trips to IKEA, I acquired four adjustable-height table legs ($60), and on a trip to Habitat, a hollow-core door ($3). My mother kindly let me hijack her and her car to transport these objects, because IKEA is more fun with someone else, and doors don’t fit in my car. Once the table was home, I screwed the legs on, and flipped it over to stand on its own. And promptly flipped it right back over and unscrewed the legs. Each leg took five screws, too.
Did you notice the words “hollow-core door” up there? That means a door that’s basically air inside. Not entirely, there’s a grid structure that gives it some rigidity, but each actual side of the door is only a fraction of an inch thick. There are solid pieces of wood on all sides, but I’d screwed the legs into the door far enough from the edges that I hadn’t hit a single solid piece of wood. When I flipped the table over, it made a really worrisome creaking, cracking noise, like maybe that very thin piece of wood was not going to handle the stresses of holding table legs. So I moved them out to the very corners, making sure that at least two screws went into a nice solid edge. This time when I flipped the table over, it only made a little bitty creaky noise, like the screws that only went into the thin part weren’t thrilled, but the other ones were going to do their jobs. So now I have a table, and it is really useful, as I will describe in the next post. (Just don’t lie under the table to see all the holes from the first time I screwed the legs on!)
Here’s a shot of it covered in stuff – my studio is a bit of a disaster area at the moment, between the not-quite finished upholstery project, my mom’s birthday present, and Chaucer’s love for pillow stuffing.

